 I've been using different types of flour recently, trying more wholegrains as well as looking for interesting flavours and texture. There's more to life than wheat, and anyway, I'm not convinced it's that good for you. I haven't ruled it out though, it just has to be worth it, such as with silky and elastic homemade papardelle or deilcate ravioli. As Oscar Wilde said, "Everything in moderation, including moderation."I believe that homemade is best, especially when it comes to bread. Or at the very least, bread made traditionally and slowly by a proper baker. It takes a little more time, effort and planning, but it's worth it and you can always freeze extra for toasting. This loaf uses khorasan flour, an ancient Egyptian grain that is soft, nutty and delicious.My sourdough starter is one year old this month, I'm very proud of that. I've kept it alive for longer than some animals. Like all pets though, it does have to be fed, and sometimes cleaned up after. I keep mine in the fridge in a state of suspended animation, feeding it once a week when I make a loaf. There are plenty of starter 'recipes' out there, but basically do this:Get a large glass kilner jar, fill it 3/4 full with an equal amount of flour and water. Start with a mix of wheat and rye if you like. Stir it well and leave open on the kitchen bench for a couple of days. Throw away half of it and replace with more flour and water. Leave for another day. Repeat this for five to seven days and you should have a nice bubbly and tangy starter. Now you can close the lid properly. Look after it and it should last indefinetely.To make great sourdough, I would recommend buying a bannetone and using a lidded cast iron casserole dish (also known as a Dutch Oven). It bakes and steams the dough with it's own moisture so you get a beautiful crust. If you don't have one, just use a baking tray and put a bowl of ice cubes in the bottom of the oven to create steam. You will notice the difference if you just take a little time and see bread-making as an act in itself. This recipe works equally with wheat flour or other types, you may just need to add a little more or less water.Ingredients240g sourdough starter300g khorasan flour (kamut)30g rye flour60g strong white wheat flour8g saltApproximately 255ml water. If your dough is too stiff add a little more. Bread making is also about using your senses. These will improve with practice.Extra flour for dustingMethodI use my Kenwood Chef to do all the kneading for me, but you may have tension and anger you want to work out by hand. Either way, the dough needs like us all, to be kneaded. I usually do it for about 12-15 minutes.Add the starter to the bowl and pour in the flour and salt then mix well. Slowly add the water and gently incorporate it until well mixed. Knead on the bench for about 15 minutes then put back in the bowl, cover and leave to rise for four hours.Take the dough out of the bowl, knead for a minute or two and shape into a ballthen dust very well with flour.If you're using a banneton, make sure it is well dusted inside with flour. If you like, you can sprinkle some rye grains or other seeds into it so they come out on top of your loaf. Put the dough in, cover it and leave to rise again for another eight hours. I usually leave mine overnight, but be careful to not leave it too long otherwise it will overprove, have too much air in it and collapse.Heat your oven as hot as you can with the pan inside. Remove the dough from the banneton, dust with a little more flour and put in the pan, covering with the lid. Bake for about 30 minutes, then turn the heat down to medium hot and take the lid off. Bake for another 20 or so minutes then remove from the oven and leave to cool.If you're baking this on an oven tray, make sure the ice is in the oven and keep an eye on the loaf so it doesn't burn. It should sound hollow when you tap it. Again, use youre senses.Serve with unsalted butter, thinly sliced (you can use salted butter if your partner threatens you and sees that as an open act of hostility). Or, as we sometimes do, toast it and top with avocado, chilli, lime juice, tomato, spring onion and coriander. Amazing.

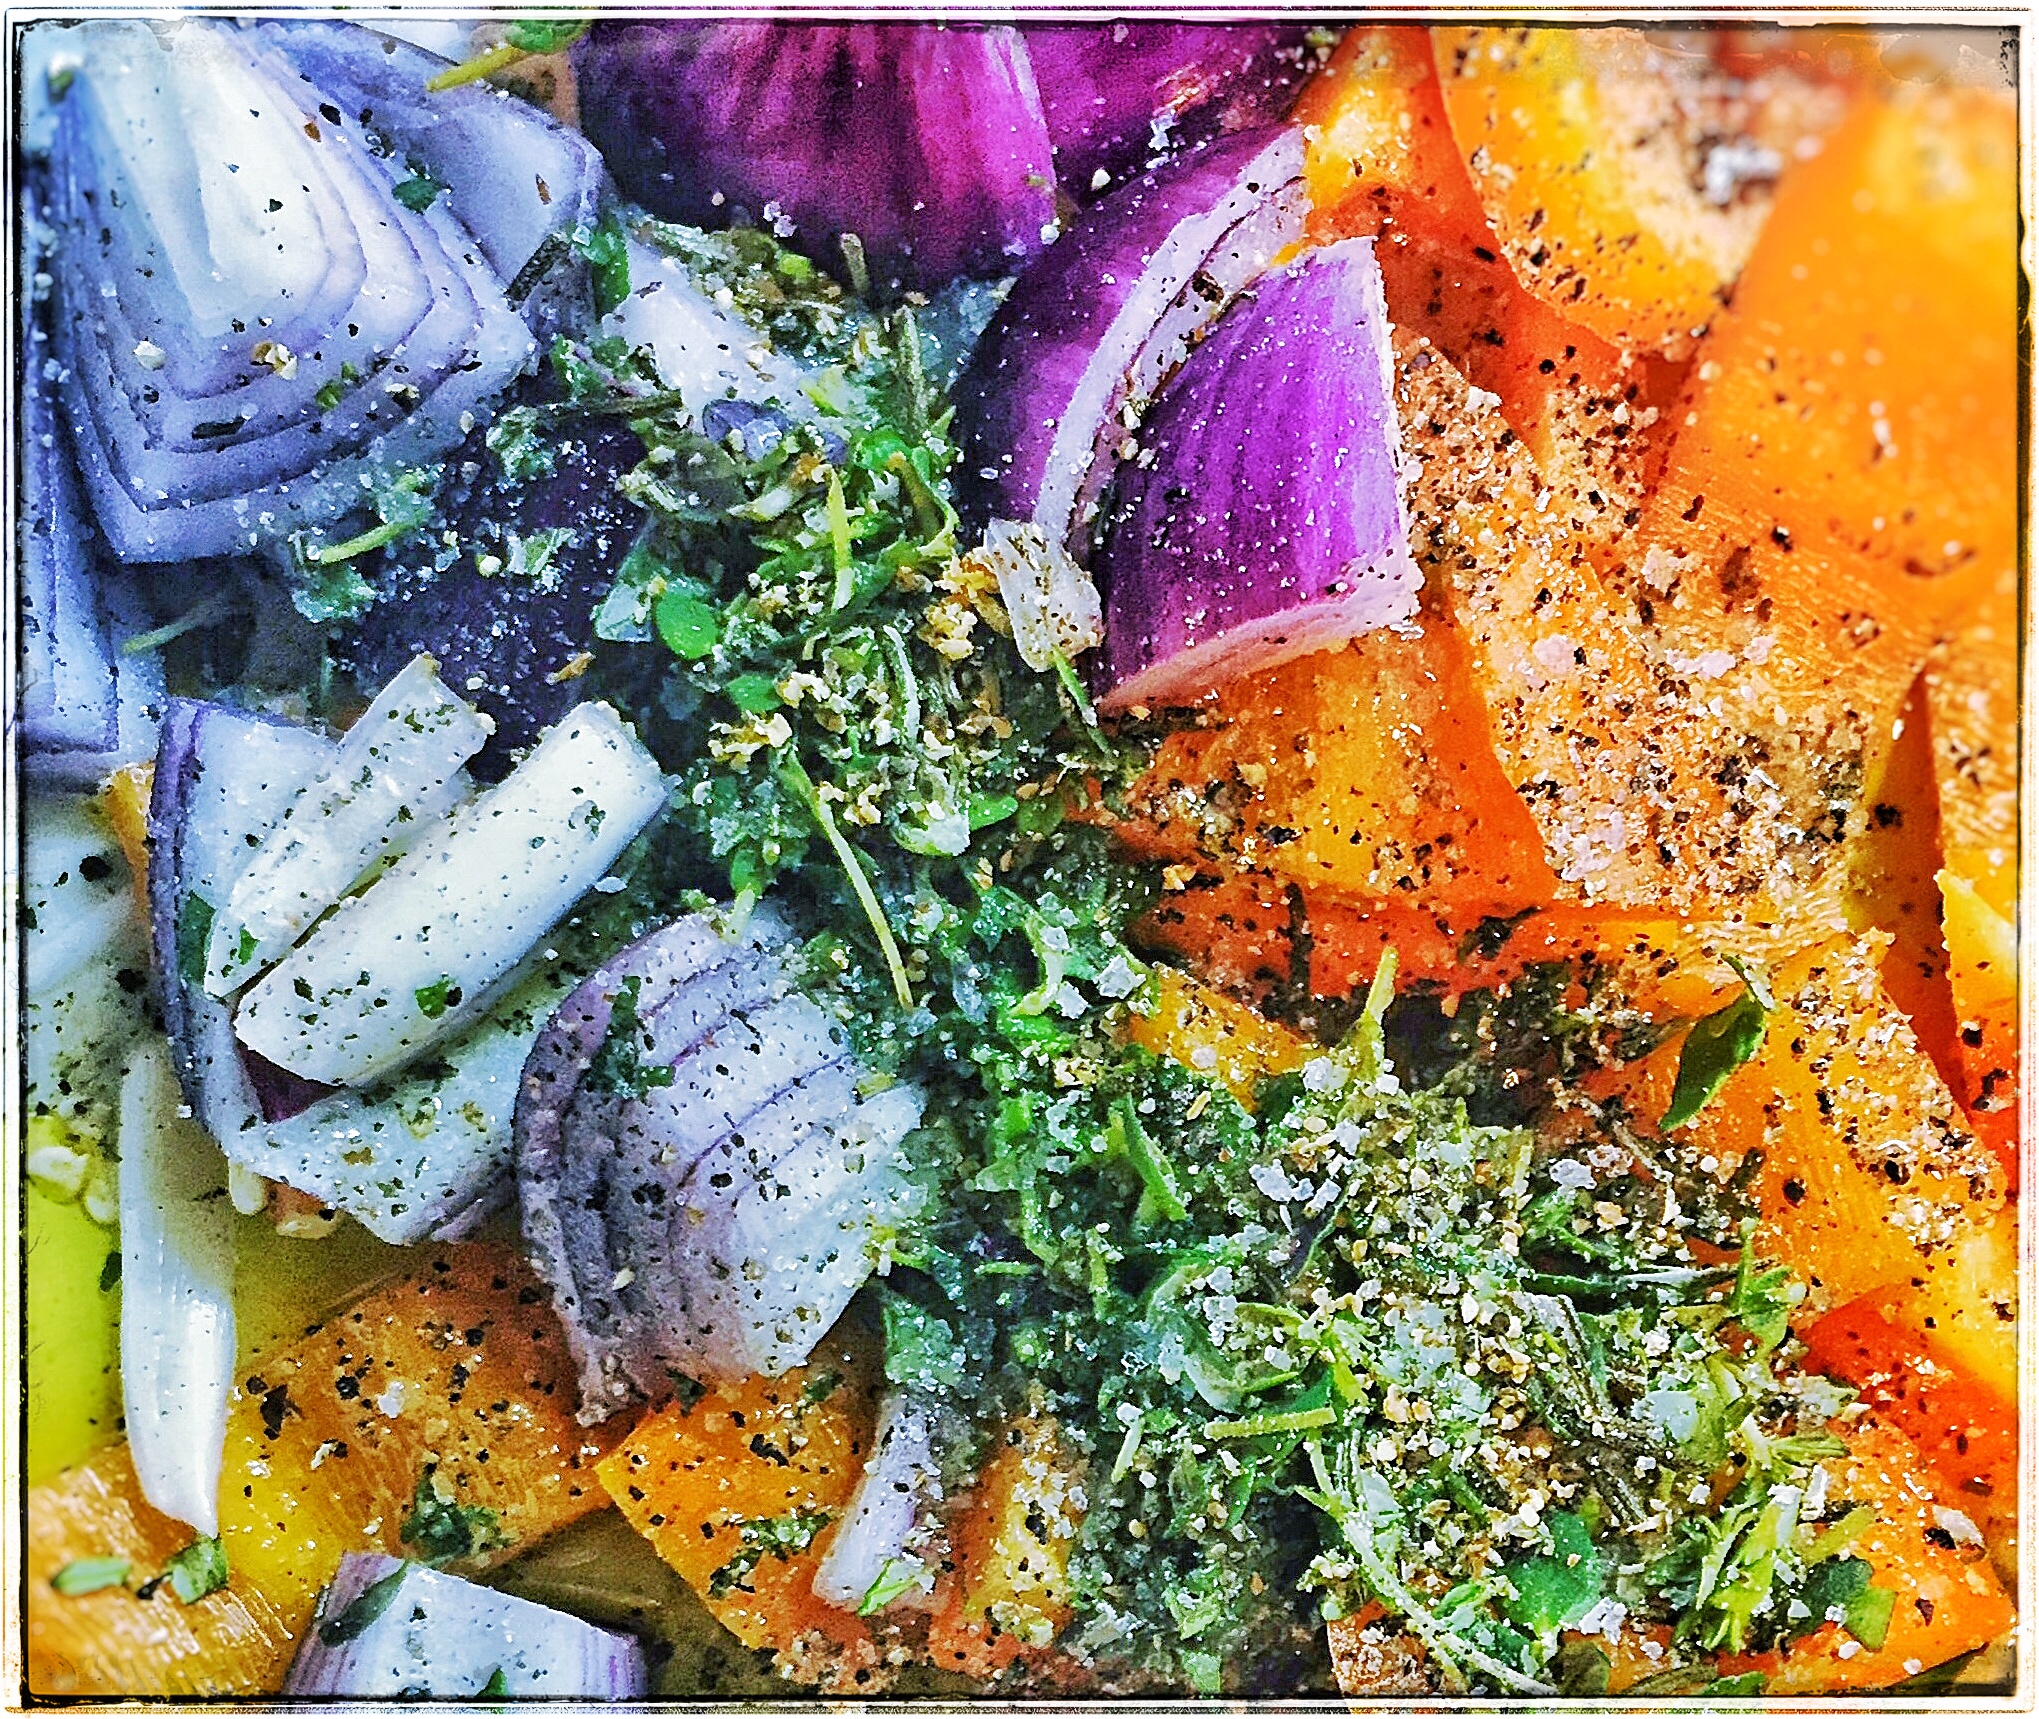
 As Phil Collins once said in Genesis, "He took one of his ribs, and from the rib he made a woman."Now I'm not as talented as Phil, so I took a rib rack from the butcher's, covered it in spices and cooked it for four hours on a low heat. I could have put some potatoes in too, but I thought there was no jacket required.And at the end, I hadn't made a woman, just a delicious manly supper. Bee was out with the 'Rock Mums' for the evening, so while this portion could have been for two, I ate the whole lot in one messy session. I didn't leave a rib spare.To stay on the healthy side, with one hour's cooking left I put in a tray of vegetables to soften and caramelise. Bright rainbow chard, patty pan squash, red onions (one of my favourite roasted things), garlic and a load of tarragon, olive oil, salt and pepper.Ingredients1 rack of pork ribsLove rub seasoning2 bunches of rainbow chard6 patty pan squash. Failing that, use baby courgettes1 bulb of garlic, halved2 red onions, quarteredA few tarragon sprigsOlive oilSalt and pepper to seasonMethodTo cook the ribs, heat the oven to 140c. Get your friend Linda Schindler to send you a jar of California's finest 'love rub', rub it all over the ribs, stick them in a tray with an inch of water and roast away.You can make your own rub if Linda has run out, from sugar, salt, pepper, mustard, garlic, oregano, smoked paprika, cinnamon and cumin. About three tablespoons of each, apart from the cinnamon. Hold back on that a bit.Rub that all over then pour on some olive oil and give it a good juicy massage.Put all the veg in a roasting tray, season and drizzle over olive oil and the tarragon. After the ribs have been in for three hours put the veg in the oven. One hour later, it's all ready.Serve with chilli sauce and paper towels and eat in private.
 I'm getting fed up of the charmless new Peter Rabbit cartoons Noah and Maya are obsessed with on television, so I'm striking back, triumphing where Mr McGregor and Mr Todd failed. I'm cooking the things and feeding them to the children. See how they like that.Rabbit is not the easiest thing to buy in England, but your butcher should be able to get some. It's a shame the supermarkets don't really sell it, but I hope that will change. My favourite way to cook it has always been slowly, in a stew with vegetables and white wine and served with plenty of mustard. Really comforting and tasty.This is a tasty and comforting dish in its own right too. I love the creamy, butteryness of polenta and the capers and mustard cut nicely through the richness. The loin cooks in minutes making this a pretty speedy meal for rabbit lovers big and small. I didn't tell the children after all...Ingredients for two100g polenta. I like
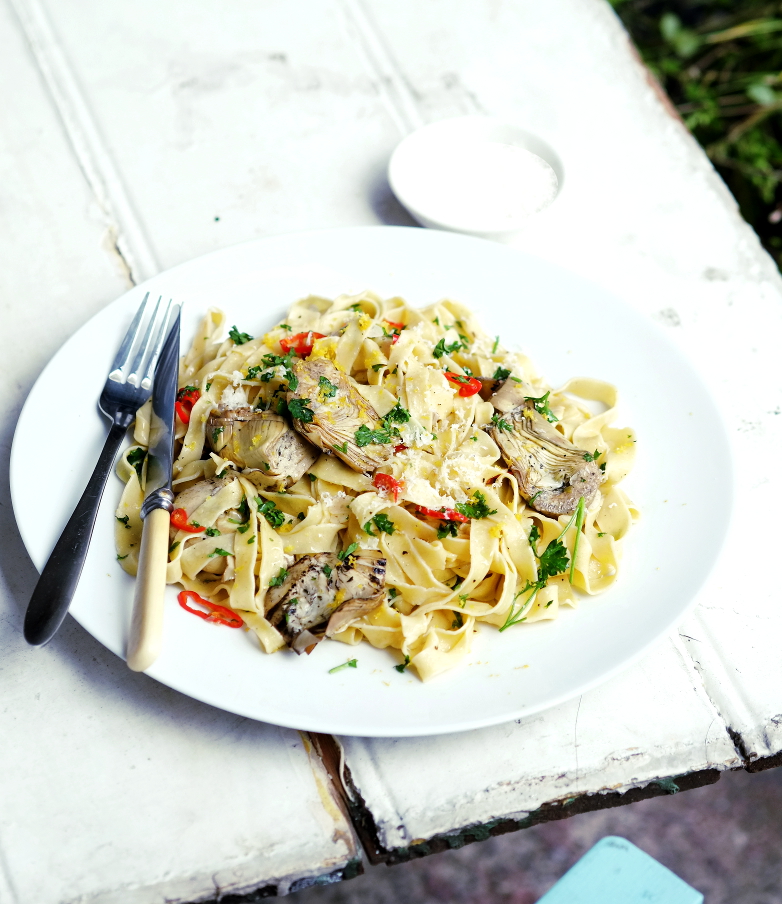 Sometimes I like to pretend I'm an Italian nonna, sitting at a table outside my stone-walled house gently rolling fresh conchiglie as my black dress flaps in the breeze. I'd chat with my neighbours, the old Montalbano and Captain Alberto Bertorelli from 'Allo 'Allo, all of us fanning ourselves with our headscarves.Perhaps not, but I do like to take pasta making seriously. It's such a simple thing, yet comes in so many shapes and sizes. It can be like origami at its most intricate or as simple as cutting the sheet into strips. And that's what I've done here. You need to set aside some time to prepare the pasta, don't try and start this half an hour before you want to eat.I've used spelt flour this time, interchangeable with strong wheat flour, but sometimes it needs a little more moisture. This is something you'll have to judge by hand. You'll get used to it with practice.This recipe is simply a touch of garlic, marinated artichokes, lemon zest, chilli and parsley. Then topped, of course, with good olive oil. You can put this together just before the pasta cooks, it only takes a few minutes to warm in the pan.So sit down, channel your inner dolce vita and treat it like therapy. I like to play the soundtrack to
 It's a good thing in life to experiment and to find out how things are made by having a go yourself. Sometimes, as with bread, pasta, stock and so on, it's much better to make your own. And sometimes, it's better left to experts, or people with big machines. I broke my food processor making almond butter and almonds aren't cheap. Far more expensive and time consuming that just buying a jar of the bloody stuff.The same goes for soba noodles. Just buy them. It's much easier than making them by hand as I did. Which is now on the list with almond butter. Buckwheat flour is a tricky flour to work with as it has no gluten in it, so you need to meditate for a few years by a wintery mountain stream before you have sufficient expertise to make noodles with it.Honestly, it's not worth the bother.I would, however, make my own miso if I had the stuff, as Yuki from
 I love fennel, and I especially love it cooked. It's gentler and softer. A bit like Frank Bruno compared to Mike Tyson.Maya, my daughter, has become especially taken with baby cucumbers recently, and hoovers up cherry tomatoes quicker than a hoover. I have a couple of boxes of the cucumbers in the fridge, and before I pickle them (if she doesn't eat them all first) I've used some in this salad, enjoyed in the calm of a weekday lunch alone. I would have added petits pois, had I not left them in a bowl on the other bench, but this was delicious enough.The borage flowers, lightly cucumbery themselves, made their delicate presence felt and the slight sweet sharpness of the tomatoes cut through nicely.The fennel, still slightly warm was soothing against the crunch of the cucumber. I went back for more.IngredientsHalf a fennel bulb per person, sliced1 baby cucumber each, sliced lengthwaysSome cherry tomatoes, sliced in halfA sprinkle of borage flowersA few tablespoons of toasted pine nutsPeas if you want themFor the dressing:1tsp Dijon mustard2tsp sherry vinegar1tsp tamarind paste (or double the lemon juice if you don't have any. It just adds a fruity sharpness)1tsp lemon juice2tbsp walnut oil2tbsp olive oilA pinch of saltMethodHeat a griddle pan to high, drag the fennel through some olive oil and season.Grill until charred a little on each side.Put on plates and top with the remaining ingredients. Season and pour over the dressing.
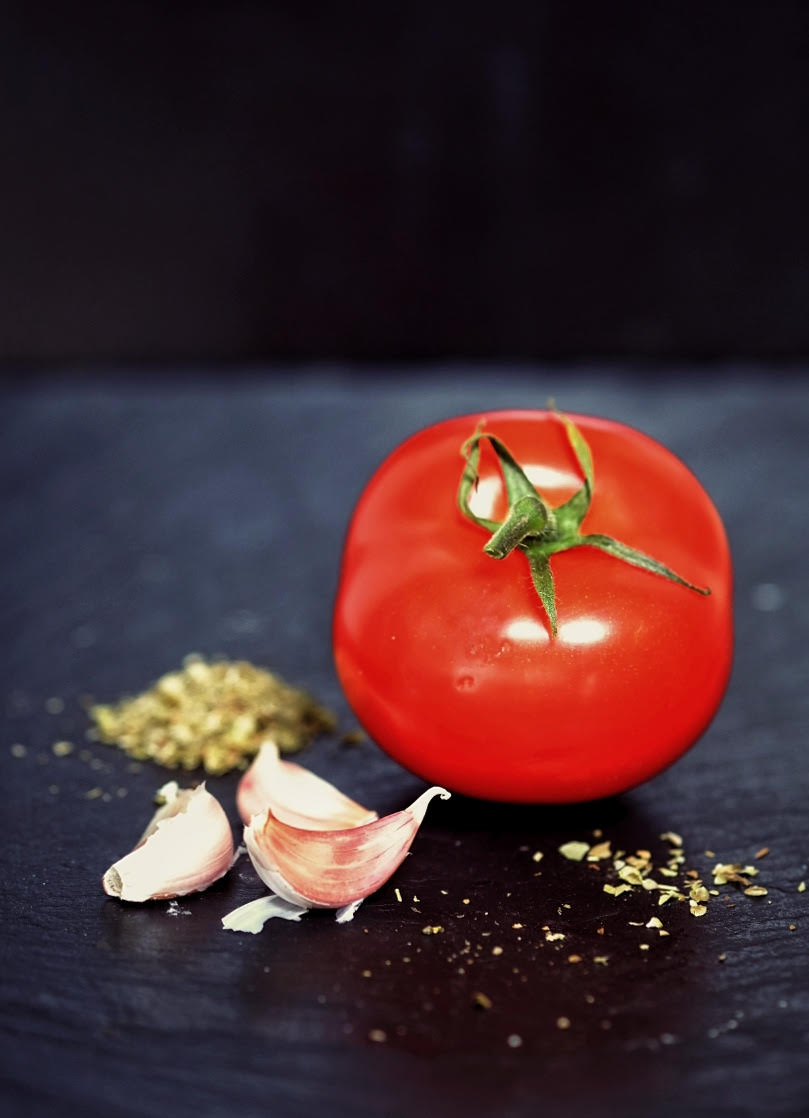 In the time it's taken for you to read this sentence, you could have already made this tomato sauce. It's that quick. I make mine in my NutriBullet, but a stick blender or food processor will do the job too.Make sure you use juicy, ripe tomatoes. Tinned are also a good bet when we're not quite at the height of tomato season. You can make this while the pasta is cooking, and then just stir it in and heat for a minute or two. It really does take ten seconds and is also great as a sauce for homemade pizza.Ingredients400g tomatoes, fresh or tinned2 cloves of garlic1 small onion1tbsp dried oreganoA small pour of olive oilSalt and pepperMethodBlitz all the ingredients together until smooth, heat through and serve with the pasta. See, it doesn't even need cooking, really.

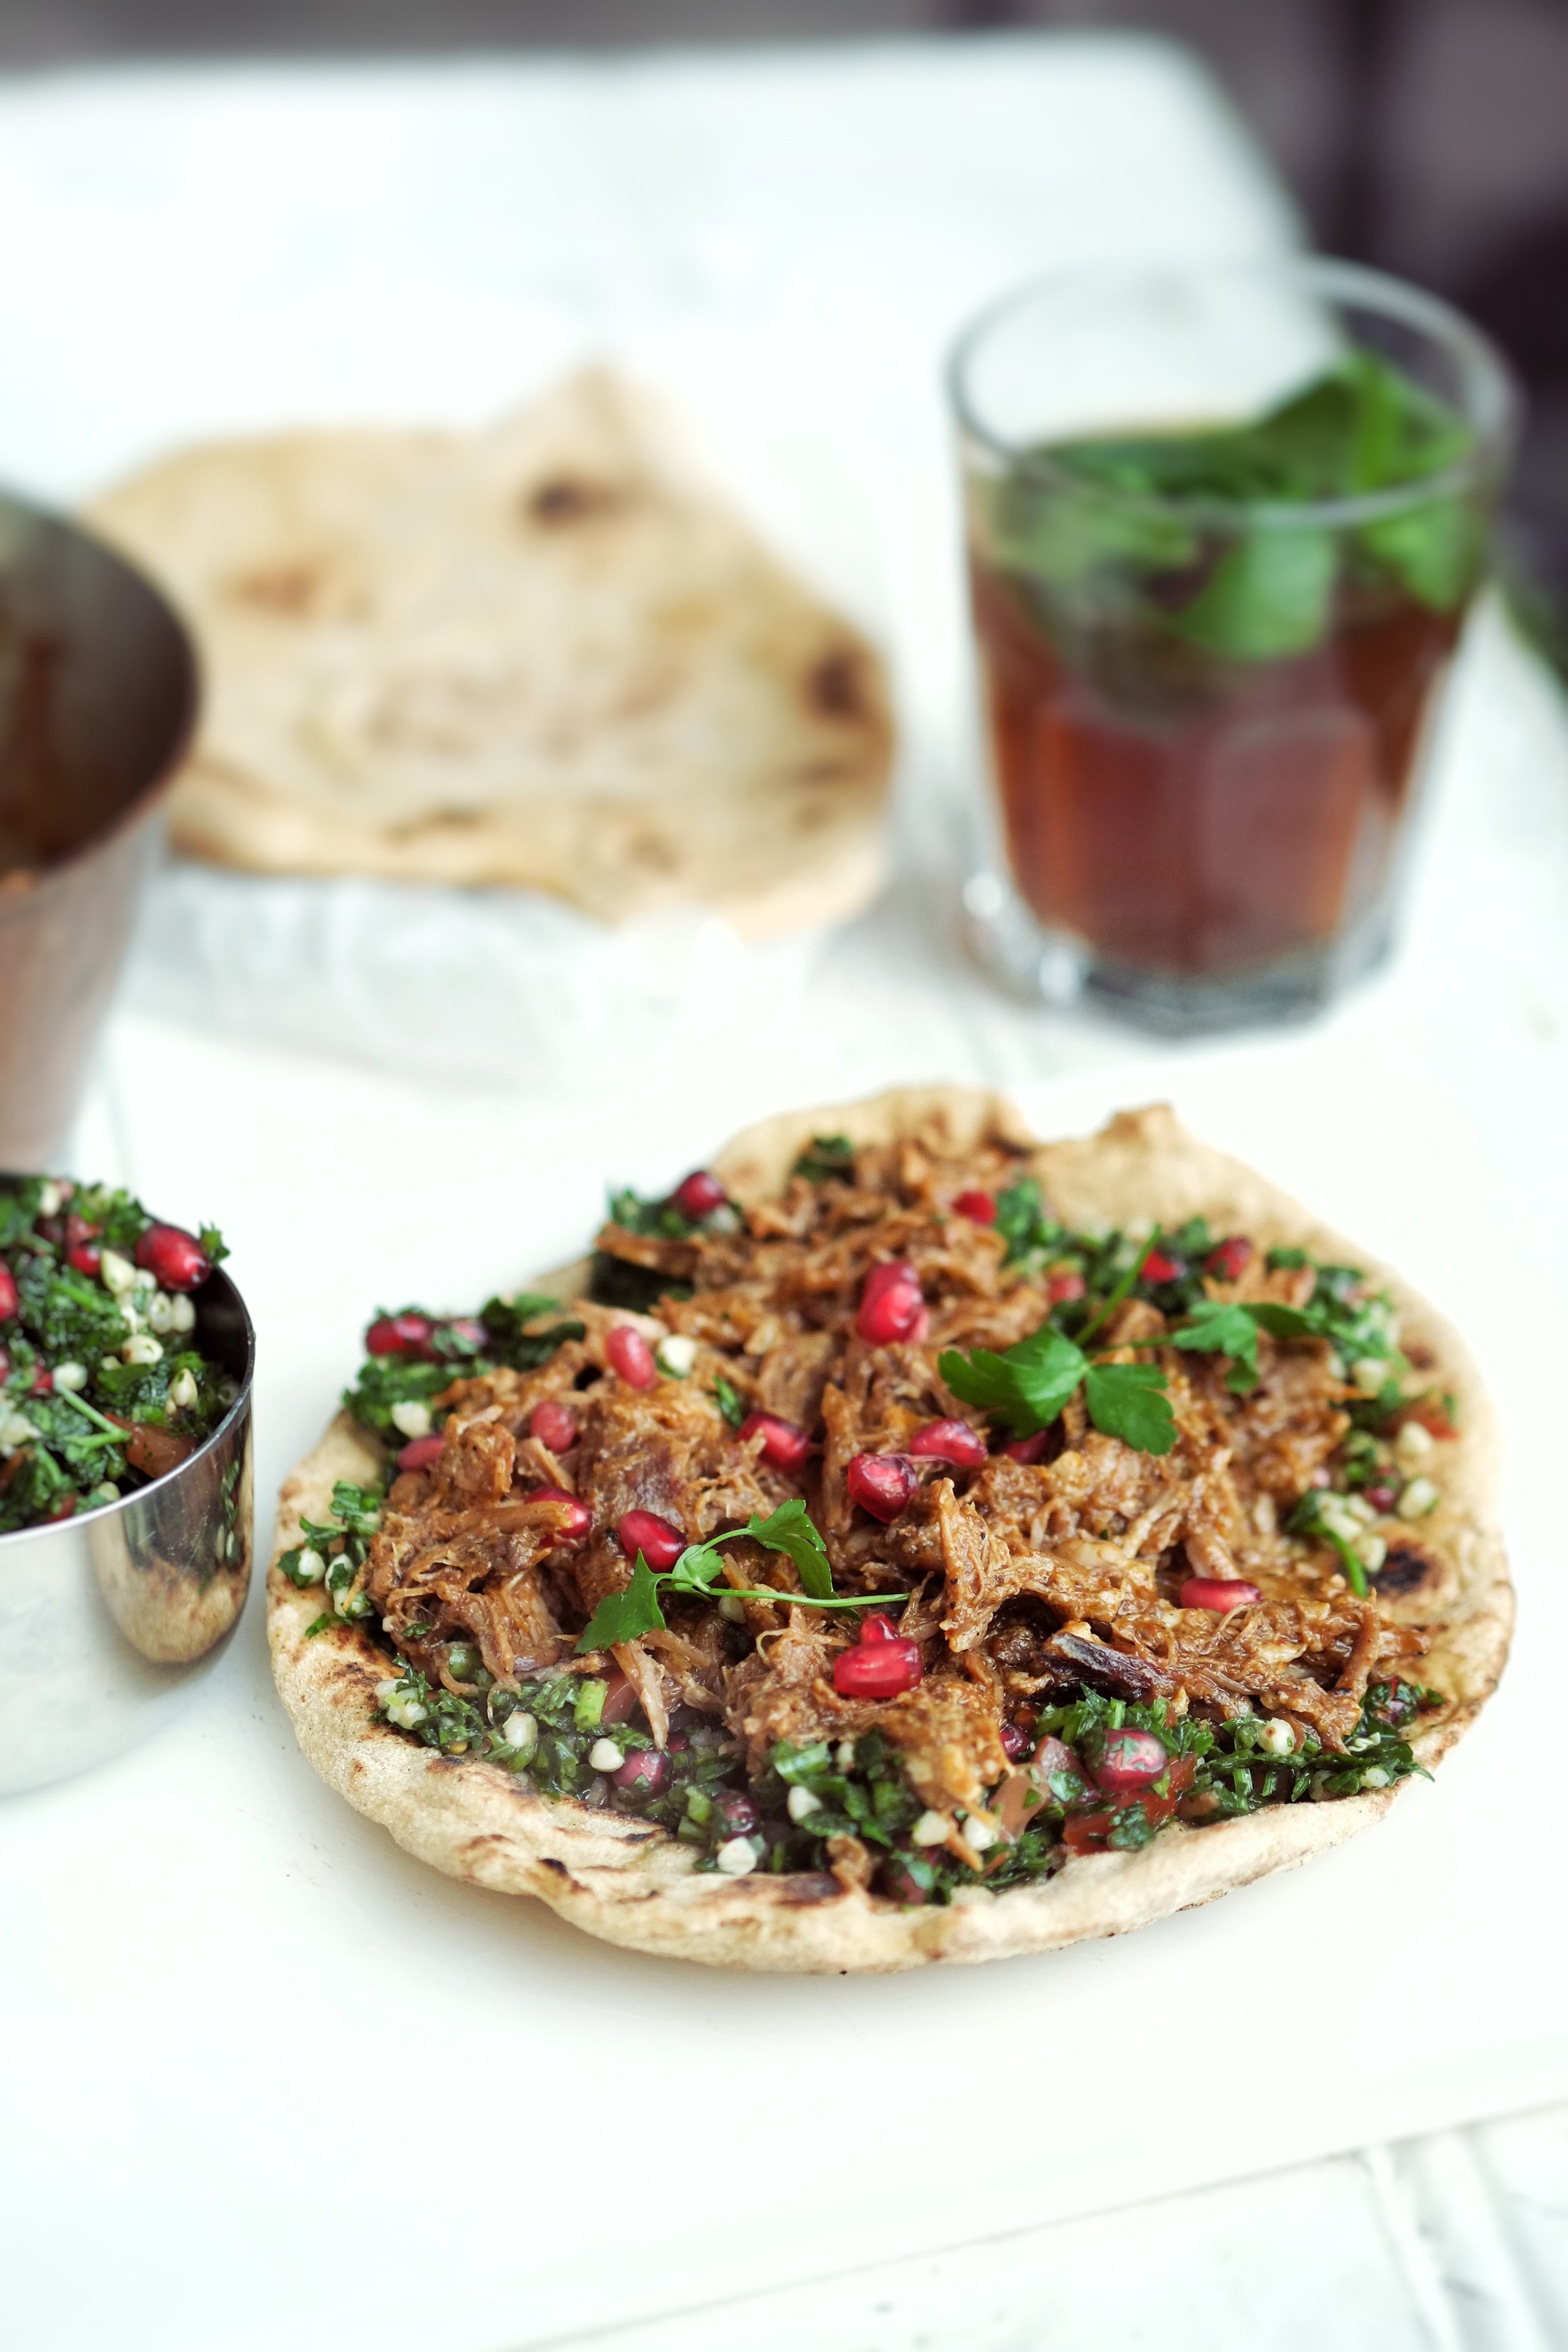 There'd probably be a punch up about who first baked bread and covered it with toppings. Probably, as with everything it was invented in ancient Egypt. Or China. Or Greece. I bet it wasn't Italy and certainly not Hawaii. It doesn't really matter though, it's a great idea. A hoi sin and duck covered pizza, as I once saw advertised, is not. What kind of psychopath comes up with these things?It's hard to beat the crisp crust and soft dough of a traditional Italian pizza and it's near impossible to recreate at home. Flatbreads, however, are much simpler and delicious in their own right. They take hardly any time to make either. And this recipe, once you've got the lamb in the oven pretty much takes care of itself. If you want, you can leave the lamb cooking overnight on a very low heat, but if like us, you have an oven that sounds quite similar to Concorde taking off, you may want to cook it during the day.Get everything prepped first thing, though, and it's just a case of assembly. There may seem to bea lot of ingredients, but there's nothing unusual here. It's all great the next day too, apart from the bread, that should be cooked as freshly as possible.IngredientsFor the lamb1/2 lamb shoulder4tbsp harissa2tbsp ground cumin1 red onion, puréed2 cloves of garlic, puréed2tbsp olive oilSalt and pepper to seasonFor the tabouleh50g buckwheat, cooked200g parsley, finely chopped3tbsp olive oilSmall bunch of chopped mintJuice and zest of a lemon6 cherry tomatoes1tbsp sumacA handful of pomegranate seedssalt and pepperFor the bread280g white bread flour20g semolina200ml water7g sachet of yeastA large pinch of saltMethodMix together the lamb coating ingredients in a large dish. Stab the lamb all over a few times just to be sure then massage in the rub. Cook in a low oven for about six to eight hours. Remove and leave to cool. You wont be able to resist picking at it. This is almost the best part, pulling the meat away, licking your fingers and secretly stuffing your face in the kitchen. When cool, you can shred it with your hands or a couple of forks. Put all the meat in a large bowl and set aside.While the lamb is cooking, make the bread and tabouleh.Mix together all the tabouleh ingredients and taste to check the seasoning and balance. Adjust as you see fit.Mixt the bread ingredients together, adding the water a little at a time as you mix it in. Knead for about five minutes, cover and leave to rise for half an hour.Divide into six balls and roll out flat into circles about 3mm thick.Heat a frying pan (I prefer cast iron for this, but don't worry too much) until really hot andcook the bread one at a time until it puffs up and turns golden in parts. You can then flip it and put it directly on the flame to finish if you have gas. Can't do that on an induction can you, eh?Wrap the breads in a towel and leave until ready.Serve the breads topped with the tabouleh and shredded lamb with a spoonful or two of tahini and natural youghurt.

 Bee has gone out again, leaving me alone to play with my favourite cupboard in the kitchen, The Cabinet of Curiosities. For once, though, I'm not tempted by dried fish souflé with truffle juice and barberry powder. As tempting as that may sound to you, you'll have to write that recipe yourself. Don't fear though, here's a five minute dish that is the epitome of quick, simple cooking with good, fresh ingredients. I don't often eat squid at home, so tonight was the perfect opportunity. The cupboard can wait.Squid, quickly seared and served with a little kick of chilli flakes, salt and pepper is one of my favourite snacks. Even better if it's in a light batter. Batter light than never I always say. The perfect sunshine accompaniment to a cold sparkling drink outside.You could use papardelle pasta if you prefer the carbs, but I was on a low calorie day anyway so held back.Ingredients (for two people)250g small squid1 Courgette2 small cloves of garlic, crushed1 red chilli, as hot as you likeOlive oilSalt and pepperLemon zestShave some ribbons of courgette with a vegetable peeler and sauté them for no longer than a minute with the garlic and a sliced red chilli. Put that on the side, heat the pan to vesuvius levels, throw in a splash of olive oil and cook your well seasoned squid for about a minute each side before mixing with the courgette.Serve with lemon zest, a good twist of pepper and some chilli flakes. Pretty easy really.
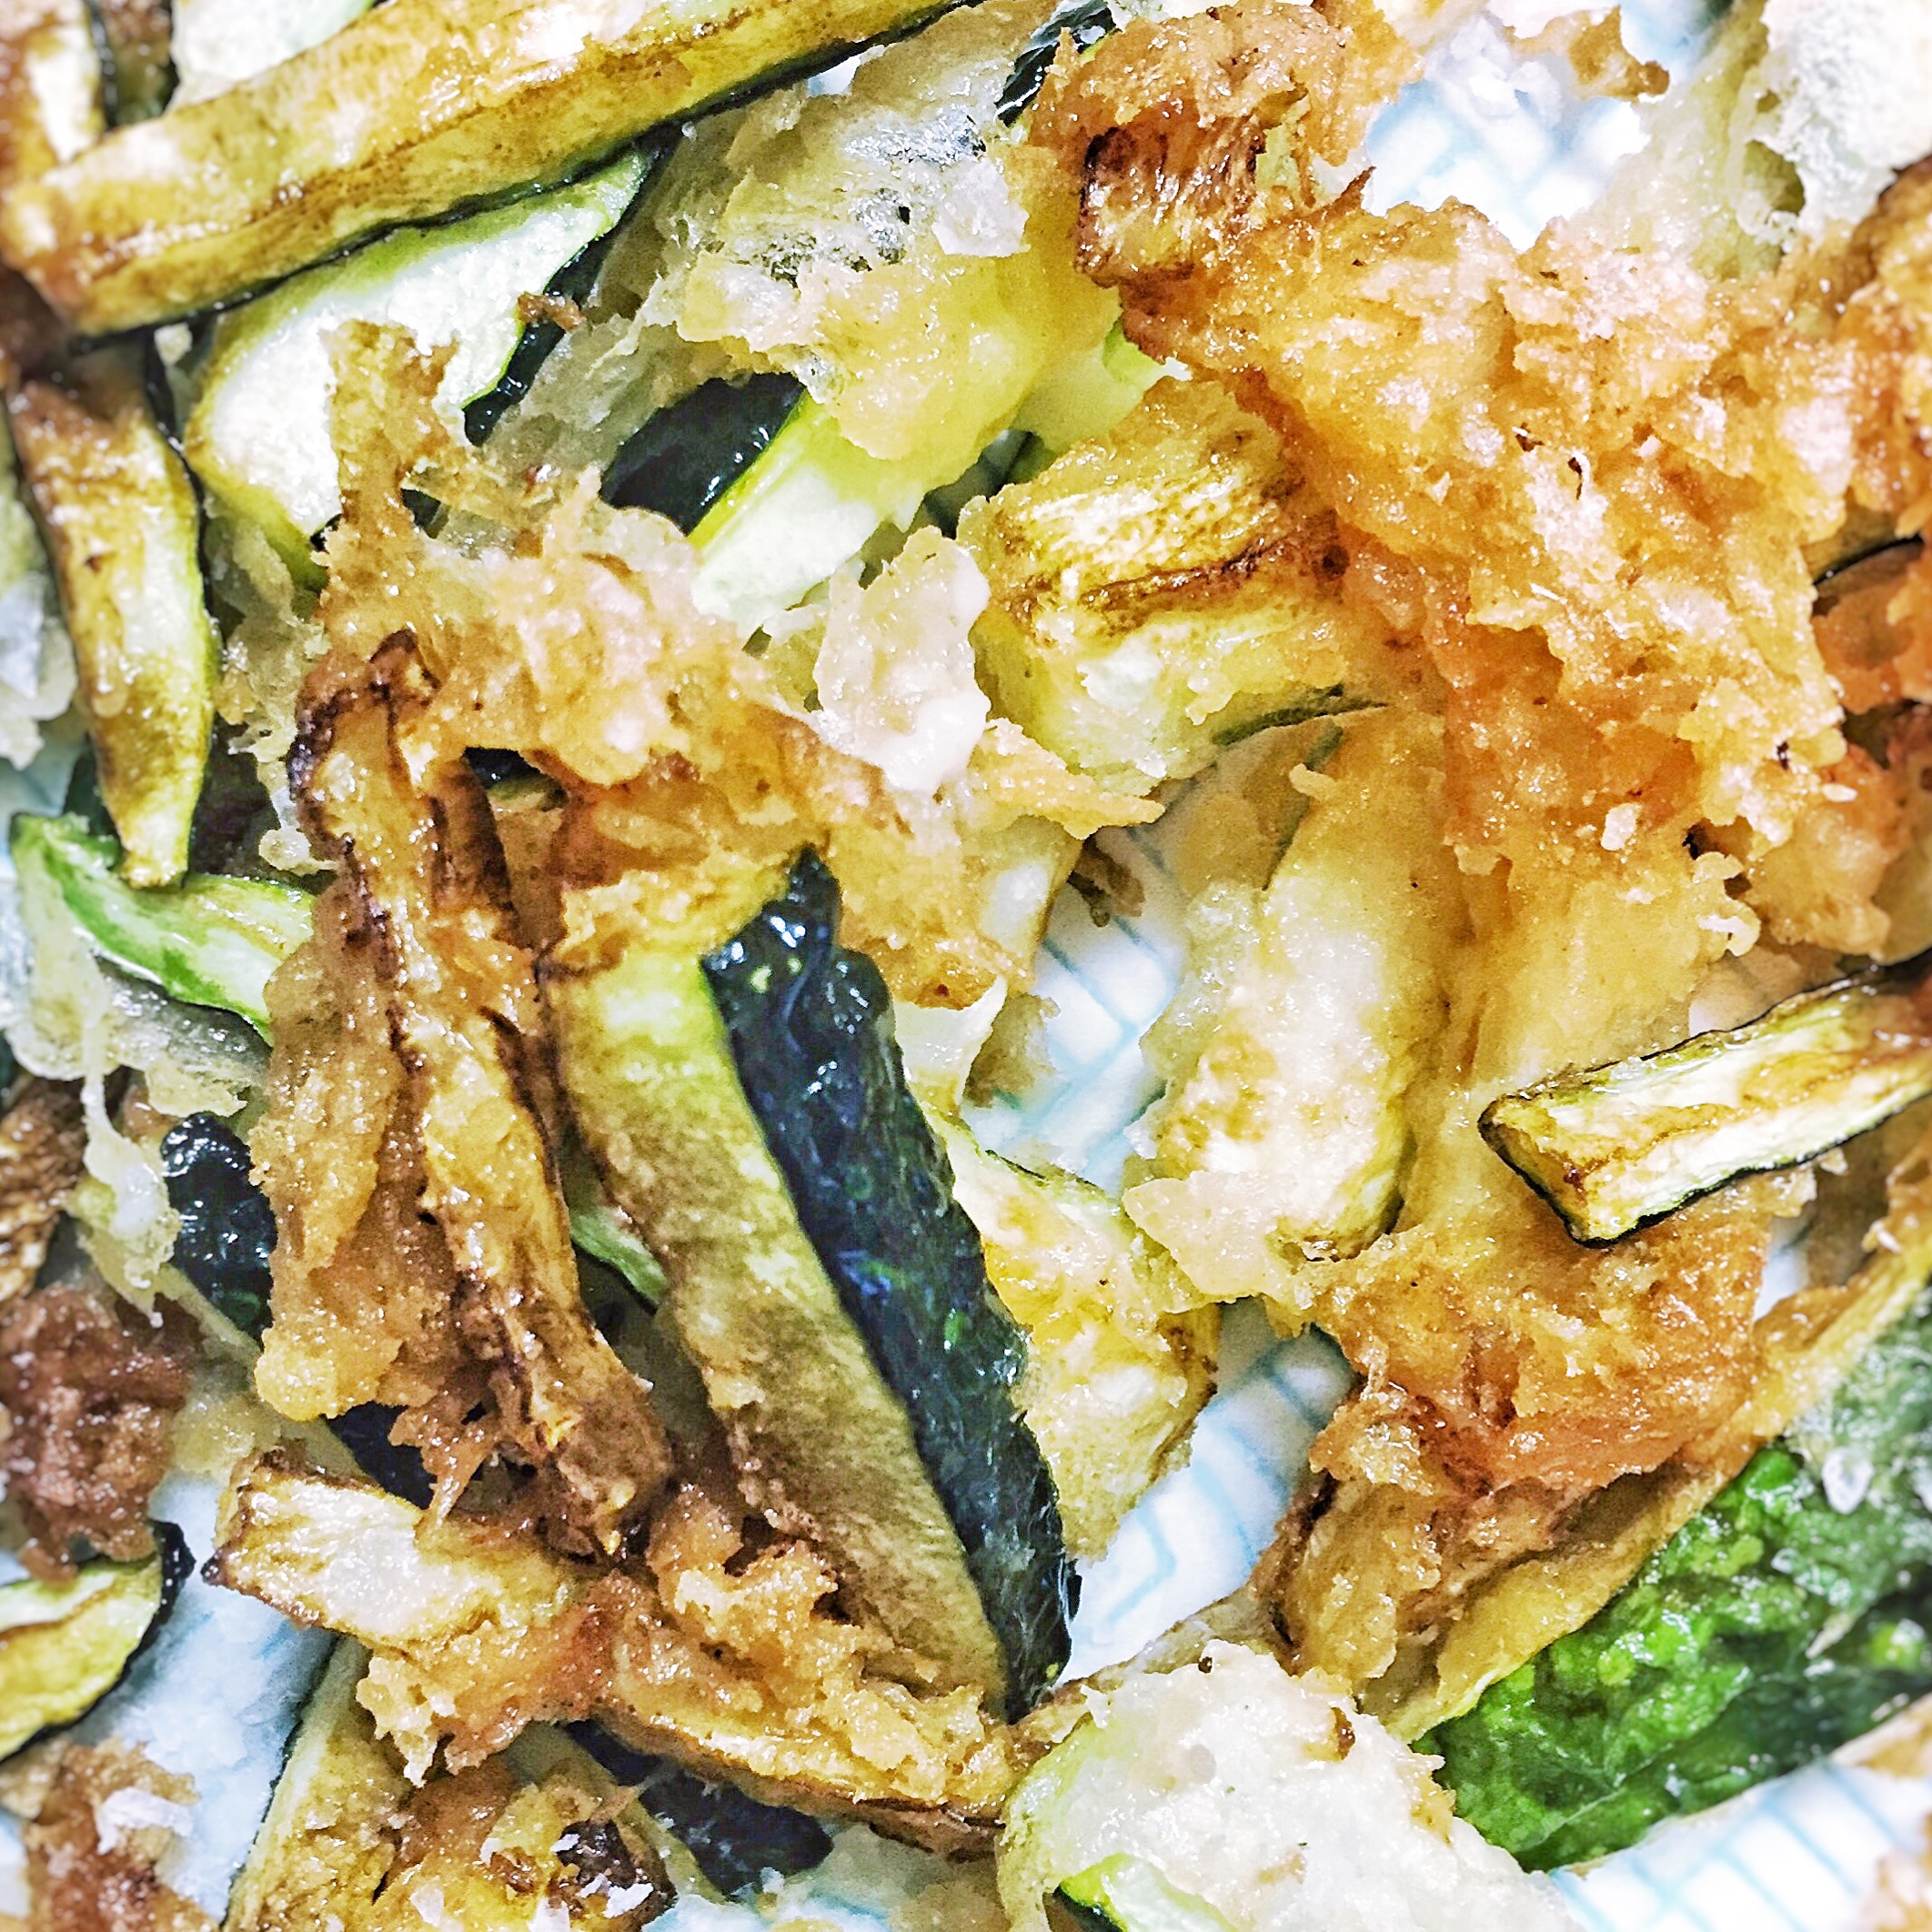
 An unseemly noise for a teenager, let alone a human came from me when I first dipped the leathery leaf of an artichoke into a mustardy vinaigrette in Brasserie Le Linois, Place Charles Michels.Usually, it's difficult if not impossible to recreate those dishes from memories of the past in a foreign country. The smells, the sounds, the air all colour our memories and we are destined to be disappointed. But fear not! The artichoke doesn't suffer from this problem. It tastes the same to me now, dipped in that dressing as it did all those years ago.How does this happen I imagine myself hearing you ask? I have no idea, but being May, and them appearing in my greengrocer I'm not going to ask too many questions.You can cook them in simmering water, covered for 30-45 minutes depending on their size, or, if you are desperate for your hit, they do just as well in the microwave, wrapped in clingfilm for about ten. I prefer simmering them though, you can add aromatic flavours to the cooking water.To the water, add 2 fresh bay leaves, a tablespoon of peppercorns, a large splash of tarragon vinegar (or plain white wine vinegar if you prefer) and some salt. Bring the water and artichoke to the boil, then simmer until cooked, that is, when the leaves come away easily.Leave it to cool a little and eat slightly warm dipped in vinaigrette made by whisking together one tablespoon of Dijon mustard, a pinch of salt, two tablespoons of tarragon cider vinegar (or again, plain) then slowly incorporating about ten tablespoons of olive oil. Use less if you prefer a sharper dressing.Pull the leaves from the globe, dip them in and tease off the flesh into your mouth as you remember your long lost youth...

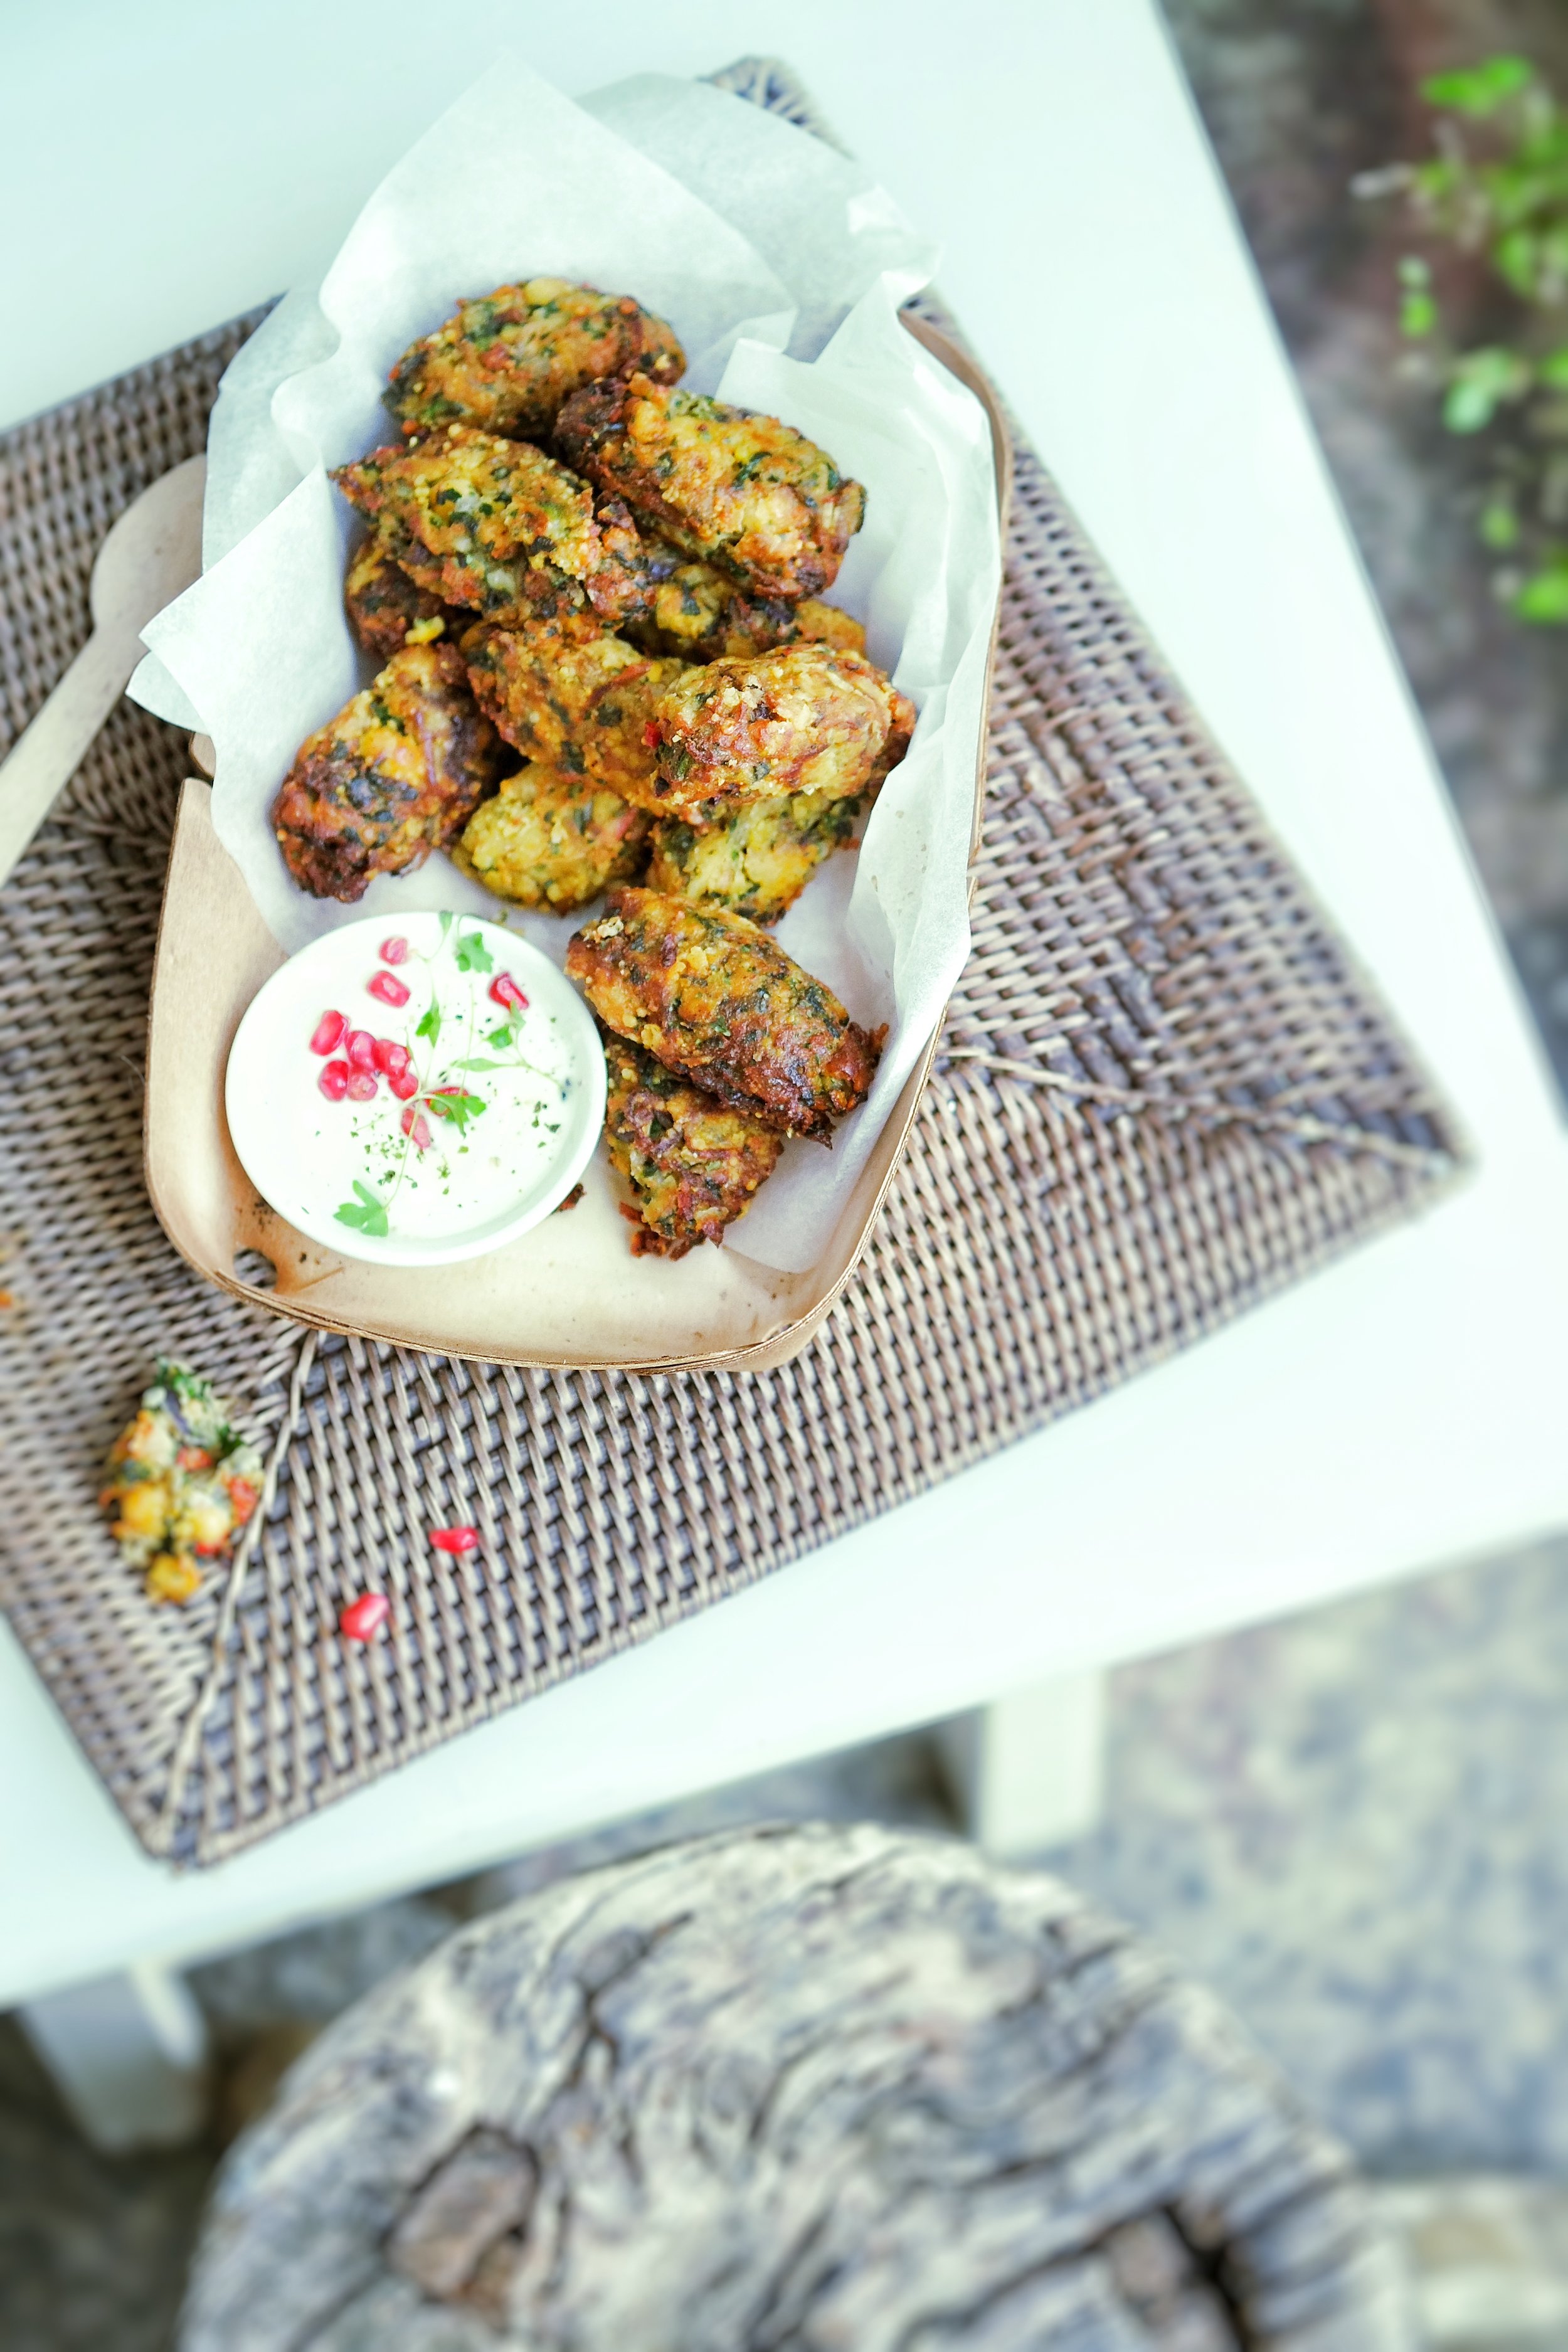 I've had falafels in the past where I'm not sure if they've dropped a squash ball in the wrap and disguised it with garlic mayonnaise or after a busy day, they've swept all the dust from the floor and glued it together with chilli sauce. That could, however, be down to the kind of places I've visited and the time of day I've found myself there.I've heard talk here and there of the best falafel in London, without really paying attention, but

 I have no idea why it's so hard to buy a single pepper in the supermarket sometimes. I wanted a red one but they only had multicoloured multipacks. Maybe it's the only way to get rid of the orange and yellow ones. No one gets left behind.I only really use red and green ones (a chilli is not a chilli without green pepper), so I thought I'd push the boat out, go crazy and wild and use orange ones with this recipe. And they worked nicely. I didn't have to hold my nose as I ate. They added just a little sweetness against the herbs and cut through with the onion.We had these with as a quick supper with tomato and cucumber salad, some asparagus and a couple of pitta breads.Ingredients for four skewers2 chicken breasts, cubed1 orange pepper, cut into chunks1 large red onion, cut into chunks1 large sprig of rosemary, leaves only, chopped1 large sprig of young thymeSalt and PepperA pinch of chilli flakesOlive oilMethodMix all the ingredients in a large bowl and leave to marinate for about an hour if you can.Thread alternate chicken, pepper and onion on the skewers and then pour over any remaining oil from the bowl.Grill for about five minutes each side until nicely charred. Be careful to not overcook them.Serve with flatbreads and salads
 A roast chicken is a great and fairly inexpensive way to feed a few people at lunch. Rather than making the traditional English Sunday lunch, why not marinate it in spices and spatchcock it? It halves the cooking time and makes it a bit more informal. I grill mine so you also get lovely charred bits here and there, adding to the flavour. This would be so good on the barbecue as well.If you don't have zatar in your spice drawer, you can easily make it yourself by mixing together dried thyme, oregano, sumac and sesame seeds. I also like to add some coriander seeds and a pinch of chilli flakes, for which I'd probably get into trouble for.I bought a large and small chicken just to be sure. I also wanted to be sure I'd have a thigh or two to snack on from the fridge the next day. We eat this with baba ganoush, spiced potatoes and a sumac, tomato and cucumber salad. I cut the chickens into portions and everyone helped themselves from the middle of the table. Mucky, juicy hands all round.Ingredients2 free-range chickens. Approximately 1.8kg and 1.2kgA handful of zatar, enough to rub over both chickensA good few glugs of olive oilSalt and pepperMethodGet the grill really hot. While that's happening, with some strong scissors, preferably poultry ones, (I've used the secateurs on one occasion) cut out the backbone of each chicken. Lay the chicken on a board and flatten it down with the palm of your hand.Stab it all over a few times with a knife and pour over the olive oil and spices.Give it a good massage, making sure everywhere is spiced then lay them both on an oven tray, they should fit snugly.Grill for about 15 minutes each side, until there are no pink juices then chop up on a board and bring to the table along with a lot of kitchen paper.
